Installation
How to install Orion CLI
CLI Installation
We'll start by installing the CLI globally.
Open your code editor in your project
Open a terminal and download the CLI globally:
npm i -g @orionhosting/cli@latestMake sure to regularly re-download the module (don't forget @latest) to update it and enjoy bug fixes.
Now, you have access to orion from any terminal. Verify by running:
orion helpAccount Connection
Now let's see how to connect.
Go to the API Keys page in the panel: https://panel.orionhost.xyz/profile?tab=api-keys%3A%3Adata%3A%3Atab
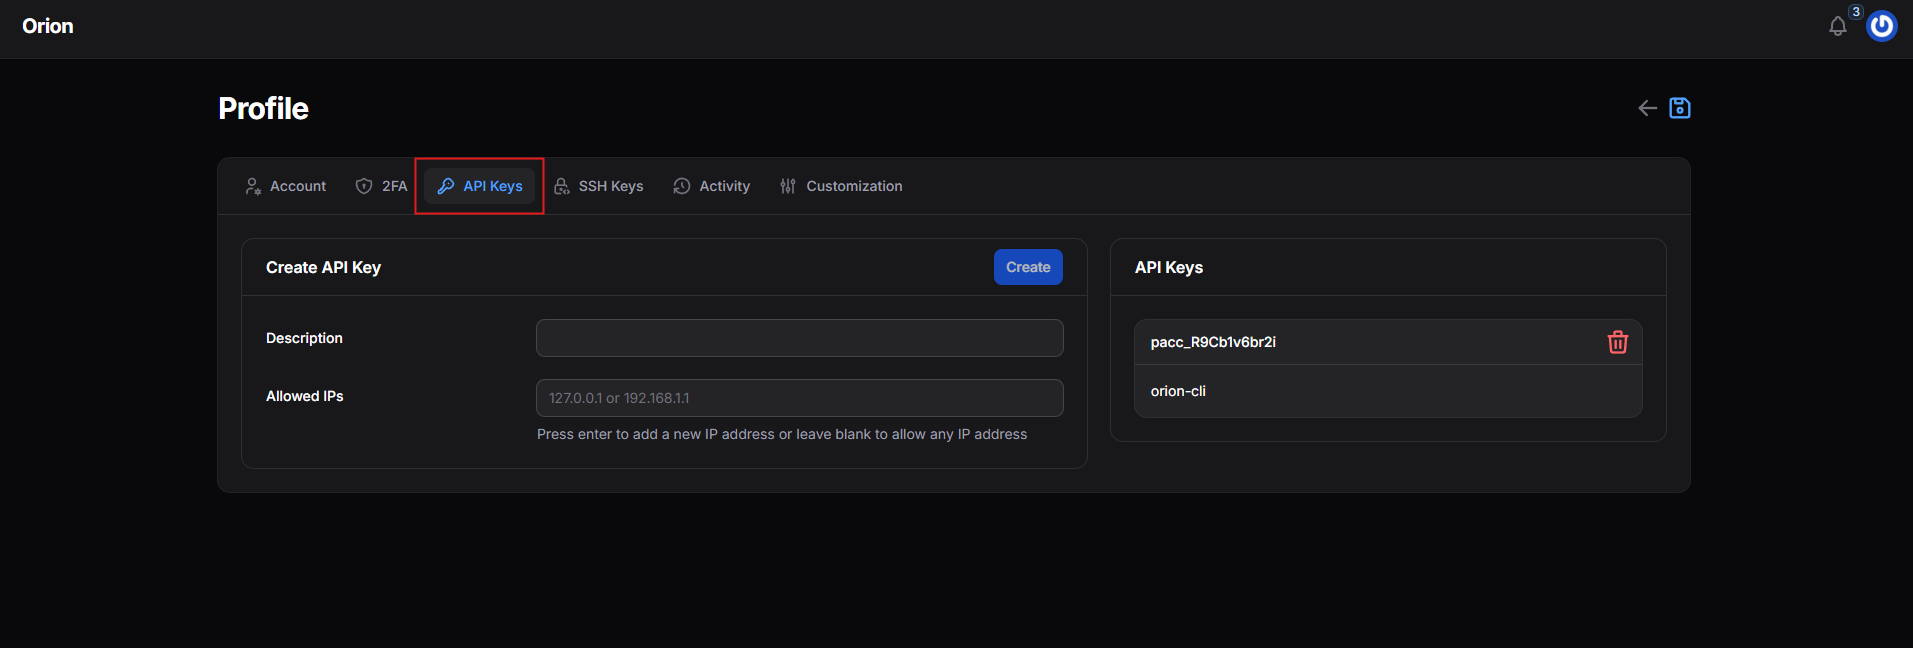
Create a key (leave Allowed IPs empty) and retrieve the token displayed in the notification:
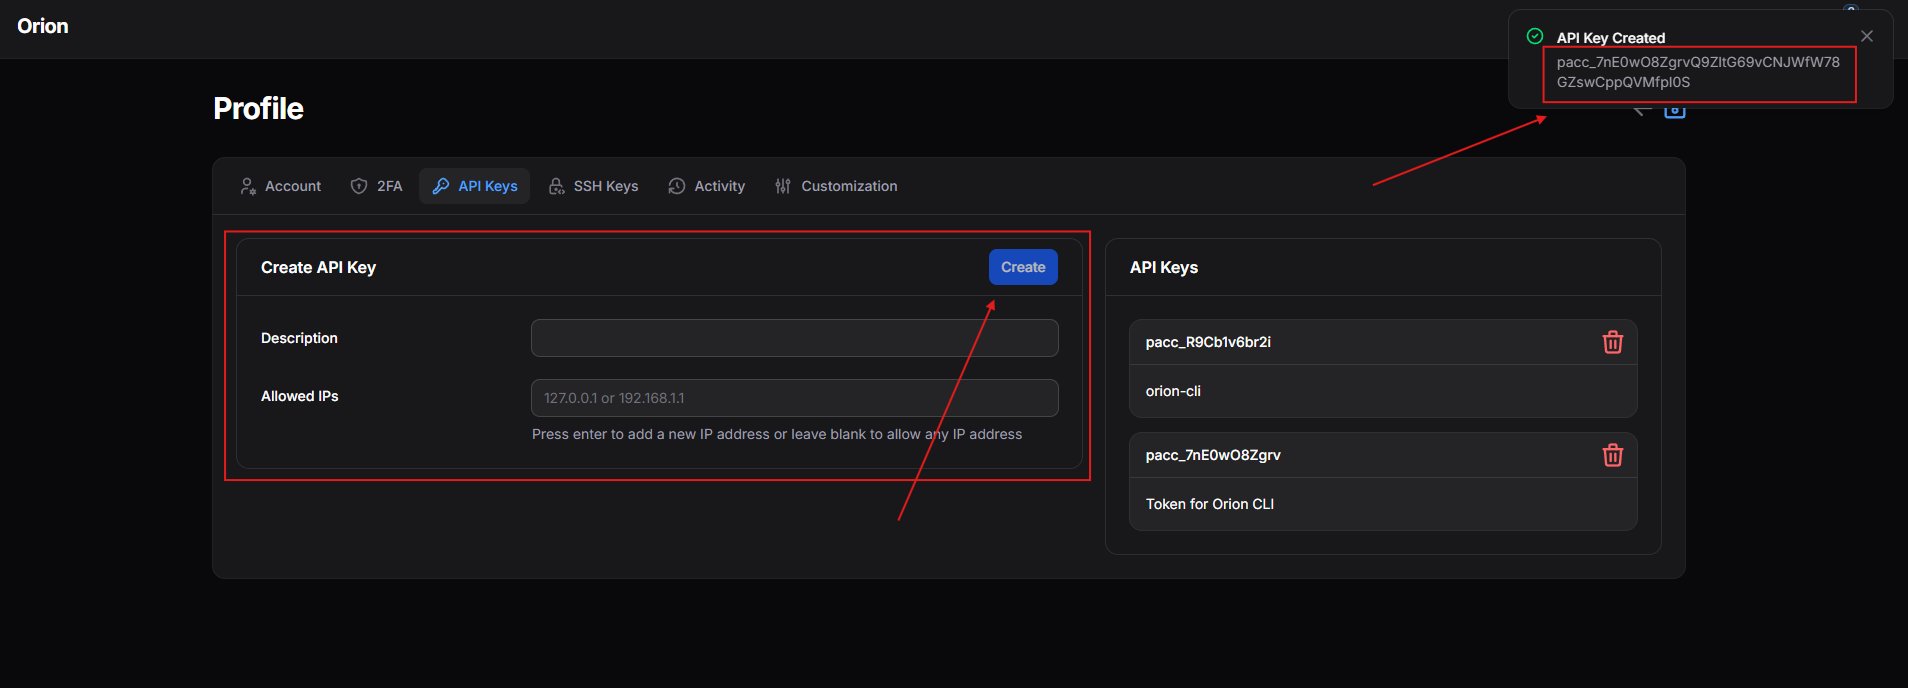
Warning, the full token is the one from the notification and not the one displayed further down in API Keys.
Execute this command and paste your token.
orion loginIf you pasted the token correctly, you should now be logged in.
Link a Project
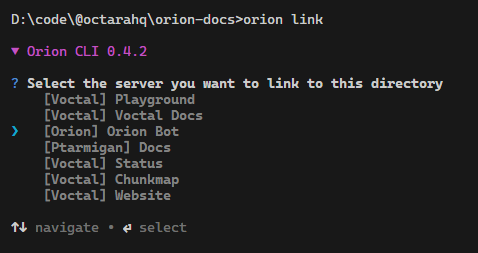
Now let's see how to link a folder to a server.
Execute
orion linkAnd select the desired server:
Once linked, an orion.config.json file has been created. This is where you configure the project options.
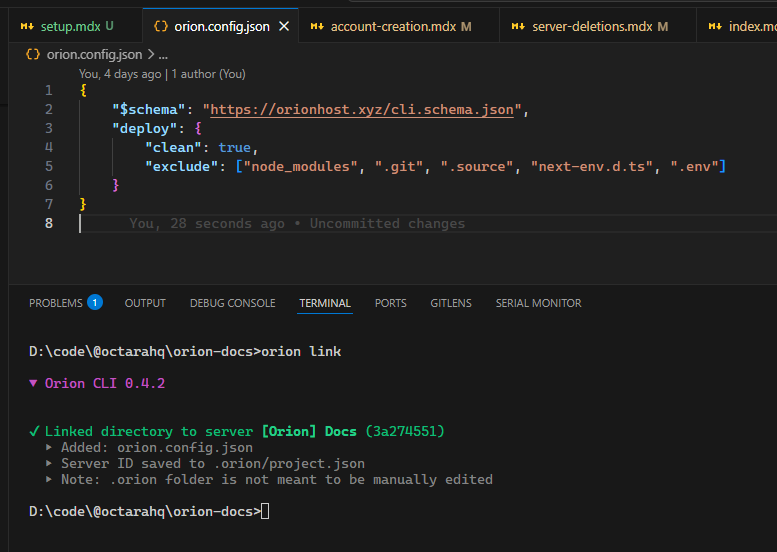
The .orion folder that was created should not be manually modified. It is managed by the CLI and should not be
committed to Git.
Your project is linked!
orion open # open the panel
orion status # see its status
orion restart # restart the server
# Run `orion help` for all commands
Repository
If you find the CLI useful, feel free to star it ;)
voctal/orion-cli